|
Think & Tinker, Ltd.
P.O. Box 1606, Palmer Lake, CO 80133 Tel: (719) 488-9640, Fax: (866) 453-8473 Sales: Sales@thinktink.com, Support: Support@thinktink.com |
|||||
|
Think
& Tinker Ltd.
 SkypeMe at "thinkntink" |
The Modulam Hot Roll laminator is available with an optional foot switch and lamination carrier that make the application of dry-film photopolymers and pressure sensitive adhesives straight forward and very reliable.
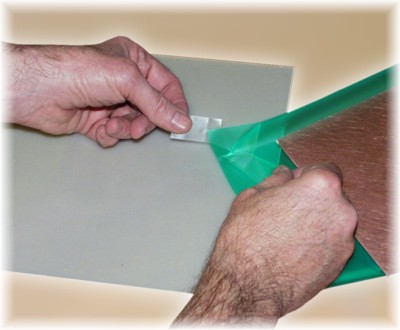 Attach two pieces of Scotch® tape on opposite sides of one corner of the photopolymer. Using a quick
pull, break the dull, matte release liner away from the adhesive side of
the photopolymer (photoresist or soldermask). Peel back 1" of the release liner along one
edge to expose the adhesive side of the photopolymer.
Attach two pieces of Scotch® tape on opposite sides of one corner of the photopolymer. Using a quick
pull, break the dull, matte release liner away from the adhesive side of
the photopolymer (photoresist or soldermask). Peel back 1" of the release liner along one
edge to expose the adhesive side of the photopolymer.Luckily the cover sheet sticks to the photopolymer far better than the peel sheet so it is just about guaranteed that pulling the pieces of tape apart will strip the peel sheet as desired. If the shiny Mylar cover peels away instead, move to another corner and try again. Do not remove the entire liner at this time. Peeling the sheets apart generates a fair amount of static electricity. This will, almost certainly, attract any piece of dust in your entire facility and deposit it at the worst possible spot in your circuit pattern. 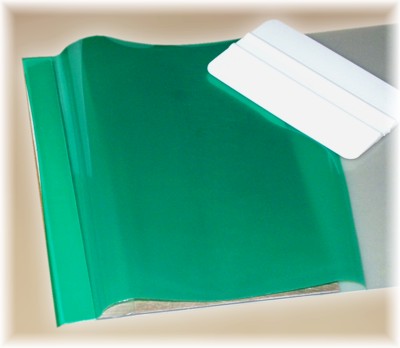
Using a soft squeegee, adhere the entire edge of exposed adhesive to the raised lip of the lamination carrier.If you are not using a carrier, adhere the film to the leading edge of the copperclad substrate you are coating. Please note that you may not be able to use this pre-laminated section of the film for circuit imaging as a result of wrinkles and/or trapped air bubbles. 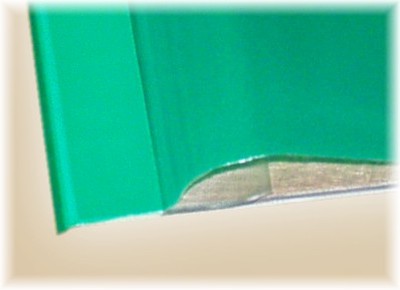
Fold the stripped release liner under the film. 
Feed the carrier (or copperclad) into the laminator and let about 1/2" pass between the rollers. If you are using a Modulam laminator, step on the footswitch to stop the feed motor. Fold the photopolymer film back over the top of the laminator and position the copperclad substrate up against the raised lip of the carrier. 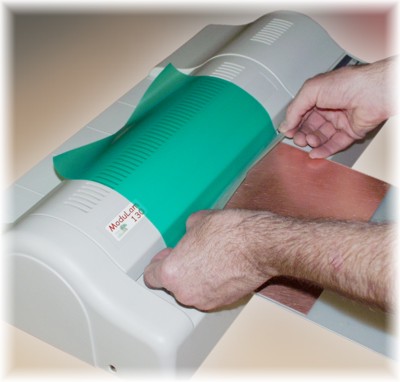
Grab the loose corners of the release liner and pull hands apart to apply a slight tension. Release pressure on the footswitch to restart the feed motor. As the carrier/substrate feeds into the laminator, pull the release liner away from the film just fast enough to keep it from passing into the machine. This will apply a mild tension to the film and prevent any wrinkling or air entrapment. 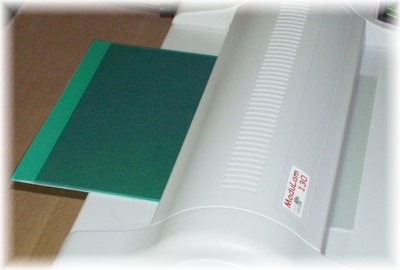
After the release liner has pulled totally away from the film, let the carrier/substrate continue through the laminator until it passes out the other side. Use an X-Acto knife to separate the substrate from the carrier by cutting along the inner edge of the raised lip. If you are making a double-sided PCB, flip the substrate over and repeat the above process on the other side. Remember to peel off the shiny Mylar film from the photopolymer on the raised lip of the carrier. This will insure that your next application of film will adequately adhere. You should remove the photopolymer from the raised lip of the carrier every 4 or 5 uses to prevent excessive buildup. For a complete list of lamination equipment and supplies, see our On-line Catalog
|
||||
|
|||||
 Home
Home

